
Hacking a Raspberry Pi into an Airplay Receiver
The raspberry pi is fully functional credit card-sized computer that is cheap enough ($25) that it can be used just for a single purpose. With this hack the computer imitates an airplay speaker, making it possible to send songs over to an old stereo wirelessly from your phone.
The Raspberry Pi generated massive hype in nerdy circles this summer when it came out and we’re beginning now to see some amazing hacks from this tiny computer now.
I’ve had mine for a few months now but I hadn’t got around to using it yet. So I’ve now decided to try to make something that I’ve wanted for a while: a product to bring my good but dated speaker system into the 21st century by enabling wireless streaming of music to it.
A possible way to do this would be to buy an Airport Express or an Apple TV and connect the audio out to the stereo. But then I would feel like overpaying for features like video streaming or wireless routing that wouldn’t be used. Besides, those products cost around £80. Airplay enabled speakers cost £200 at the low end. This raspberry pi creation should easily come in under £30.
Here’s a video of it in action.
How to fake AirPlay compatibility
To get a Raspberry Pi looking like an airplay receiver I made use of Shairport. This opensource software was created by James Laird after literally tearing open an airport express, dumping the ROM and reverse engineering out the private cryptographic key that airplay uses to identity of legitimate apple products. The github repo has the Perl source code that can be compiled for simple audio receiving only. For this project we essentially need to get this code running on a networked Raspberry Pi.
I’ll condense this down to the bare instructions for a working outcome. On the way here I had attempted many other ways to do it. I flirted with XBMC, creating a reasonably ok Apple TV-like system in the process. But frequent crashes caused me to divert my attention to this simpler, audio-only solution.
As a word of warning, one of the common pitfalls I encountered was with the very narrow acceptable power range of the RPi. The computer is powered by usb cable and any additional loads such as a wifi adapter or a budget usb keyboard can strain this power supply past it’s limits. I had several instances of odd performance or non-responsiveness due to this.
Ingredients
- Raspberry Pi
- SD card (2GB is plenty for this)
- USB Wifi adapter (I used Edimax EW-7811UN nano adapter as it is suitably tiny and is well support by the RPi community)
- Micro usb cable for power
- An ethernet cable for initial setup (can be bypassed if you instead use a keyboard and monitor to setup the Pi)
Recipe
Install an Operating System on the Raspberry Pi
An operating system (OS) is required to tie together all the ports, processors and other hardware on the computer so they know how to work with each other. For the Pi it involves downloading an OS ‘image’ onto the SD card and inserting that into the pi.
This shairport software should work on top of any OS you choose to install. But unless you’re comfortable forging your own path, stick with the default, most supported Rasbian “wheezy” image available on the official Raspberry Pi website.
The mounting process can be quite daunting to those unfamiliar with a command prompt but thankfully this is well documented and I recommend these Engadget instructions for mounting the image to an SD card.
Once you have your SD card ready, we can start using the Pi. This process is easiest if you have a hdmi monitor, keyboard and mouse available. However, I had issues with power drawing usb peripherals and so the approach here won’t use anything more than an ethernet internet connection.
To get started, insert the SD card, power cable and Ethernet.
If you are going the no keyboard/monitor route follow these instructions to figure out the IP address of the Pi and ssh in to the raspberry pi command prompt.
Otherwise insert a keyboard and hdmi cable to a monitor and the Pi will boot to the command prompt much the same.
##Upgrade all the packages
You should be faced with a command prompt similar to the following.
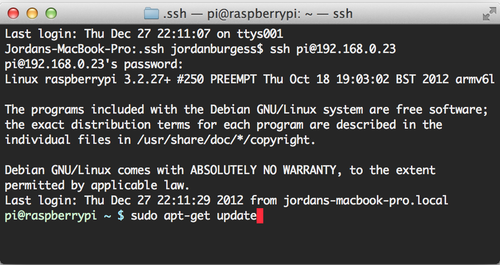
At this point it is a good idea to update all the packages on the operating system.
pi@raspberrypi ~ $ sudo apt-get update
pi@raspberrypi ~ $ sudo apt-get upgrade
Set up Raspberry Pi with wifi
This is made considerably easier by using a module where the drivers are preloaded with the OS distribution. Raspbian has come preloaded with theRealtek RTL8192CU driver that the Edimax EW-7811UN requires since the 2012-09-18 release.
Command line method: Follow this excellent guide at Savage Home Automation: Installing the Edimax EW-7811UN USB Wifi adapter.
Graphical method: If you are using a monitor, keyboard and mouse then the easiest solution is to start the GUI with startx
pi@raspberrypi ~ $ startx
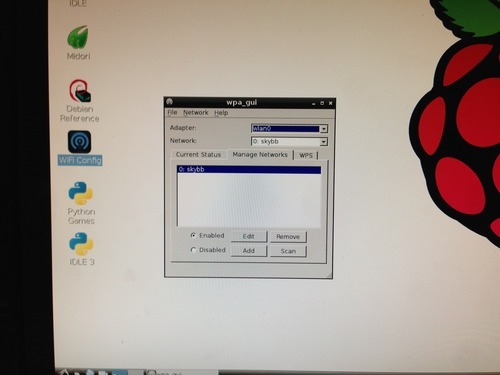
Simple method to get Wifi working.
In the GUI, use wifi config to join the network. These details are then saved to the SD card and you should have internet access from then on.
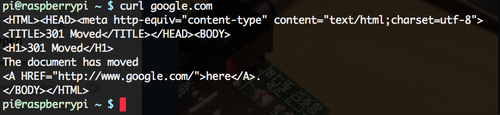
Wifi check
Remove the Ethernet cable and on the command line you check by trying curl anywebsiteaddress.com. This is an instruction to download whatever it’s pointed at from the web. If you point it at a website a correct response would be for it to list the sites HTML.
Change default audio output
Force the Pi to output to the headphone port rather than through the HDMI.
pi@raspberrypi ~ $ sudo amixer cset numid=3 1
Install shairport prerequisites
Shairport has several prerequisites that need to be installed first. This is a single instruction to install them all:
pi@raspberrypi ~ $ sudo apt-get install git libao-dev libssl-dev libcrypt-openssl-rsa-perl libio-socket-inet6-perl libwww-perl avahi-utils libmodule-build-perl
Installing Perl Net-SDP
A change in IOS 6 requires this module to installed.
pi@raspberrypi ~ $ git clone https://github.com/njh/perl-net-sdp.git perl-net-sdp
pi@raspberrypi ~ $ cd perl-net-sdp
pi@raspberrypi ~/perl-net-sdp $ perl Build.PL
pi@raspberrypi ~/perl-net-sdp $ sudo ./Build
pi@raspberrypi ~/perl-net-sdp $ sudo ./Build test
pi@raspberrypi ~/perl-net-sdp $ sudo ./Build install
pi@raspberrypi ~/perl-net-sdp $ cd ..
Install shairport
Next we want to download shairport from github and compile it into a usable program.
pi@raspberrypi ~ $ git clone https://github.com/hendrikw82/shairport.git
pi@raspberrypi ~ $ cd shairport
pi@raspberrypi ~/shairport $ make
Now that it’s made we can launch shairport! Run the following command.
pi@raspberrypi ~/shairport $ ./shairport.pl -a AirPi
The –a AirPi argument simply decides the name of the speaker in the airplay options. Feel free to rename it whatever you want.
Plug some speakers into the 3.5 mm stereo port and if it’s all working iTunes, iPods and iPads should now have an airplay option showing your new raspberry pi as an speaker.

The Raspberry Pi should show in the airplay options.
If it’s selected you should start to hear some music out of those speakers!
Now you may want the Pi to launch into shairport on bootup but essentially it’s all done!
THE RESULT
It works!

Maybe not as elegant as an airport express, but it works.
Unfortunately it’s far from audiophile quality.
The $25 build for the Raspberry Pi meant they skimped out on a decent DAC and so it just approximates one with PWM. You’re likely to notice a fair amount of background noise and the occasional distortion if you’re running directly out to the speaker system.
A USB soundcard can apparently solve these issues. I have a pair of USB powered Logitech Z120 speakers which I hope to try this out with this soon and I’ll update this when I do.
But for the time being this is a great way to cheaply extend the life of that old stereo and learn a lot about how linux works as a computer.
Follow me on twitter to keep up with anything else I make.
Edit (28/12/2012 14:22): Made #1 spot on hacker news! Join the discussion.
Edit (28/12/2012 14:53): Lifehacker featured this on their front page - here’s their article.
Edit (28/12/2012 16:06): Techcrunch’d.
Edit (29/12/2012 15:50): The installing Perl Net-SDP section had some errors. I’d written sudo (a command that allows you to write anywhere regardless of file permissions) in the wrong place. You don’t need sudo to download the git repo, you will do for the ‘./Build’ command because that writes some files to ‘/usr’ directory. I’ve corrected this now.